
This guide shows you how to upload recipients to a One-Shot from one or more CSV files.
You can upload one or more CSV files for each variation. You can also combine CSV files with recipients that you send by API or from your marketing integration. All recipients go into the same One-Shot and wait for recipient validation.
Before you start
- You need a One-Shot with the status Awaiting Recipients. A One-Shot gets this status when you click Start collecting recipients at the end of the setup.
- You need one or more CSV files with UTF-8 encoding.
- Make sure that no validation is in progress when you start the upload.
What your file needs
The Recipient upload section on the One-Shot page shows these rules. Click Learn more next to What your file needs to open them.
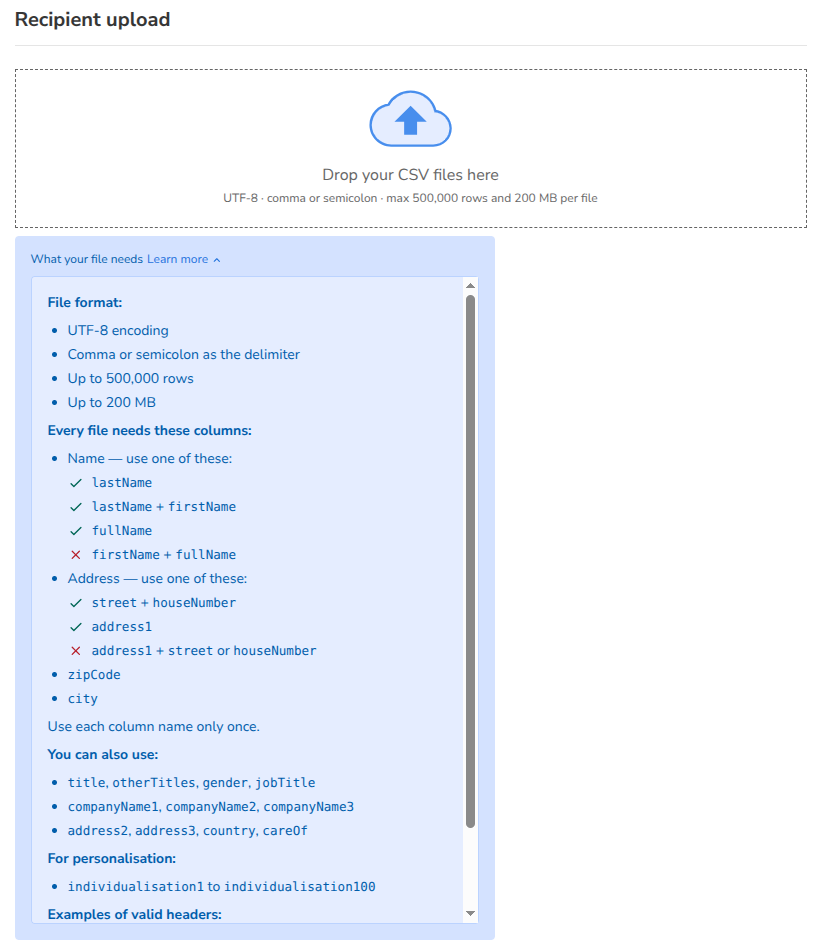
File format
- UTF-8 encoding.
- Comma or semicolon as the delimiter.
- Up to 500,000 rows for each file.
- Up to 200 MB for each file.
- The file name must end in
.csv.
Columns
The first row of your file is the header row. It holds the column names. The column names must be exactly as shown here, with the same upper and lower case. zipcode or ZipCode does not work. Use zipCode.
Every file needs these columns:
| What | Use one of these |
|---|---|
| Name | lastName, or firstName + lastName, or fullName |
| Address | street + houseNumber, or address1 |
| Postcode | zipCode |
| City | city |
Do not combine the two forms of one group:
firstNameandfullNamecannot be in the same file.address1cannot be in the same file asstreetorhouseNumber.
You can also use these columns:
title,otherTitles,gender,jobTitlecompanyName1,companyName2,companyName3address2,address3,country,careOf- For personalisation:
individualisation1toindividualisation100
Use each column name only once. The dashboard refuses a file with any other column name. Delete or rename columns that are not in this list.
Example
A header row for a file with first and last names:
firstName,lastName,street,houseNumber,zipCode,city
The same file as a table:
| firstName | lastName | street | houseNumber | zipCode | city |
|---|---|---|---|---|---|
| Erika | Musterfrau | Musterstraße | 1 | 10115 | Berlin |
| Max | Mustermann | Beispielweg | 12 | 80331 | München |
Other valid header rows:
fullName,street,houseNumber,zipCode,cityfullName,address1,zipCode,city
Step 1: Add your files
- Open your One-Shot from the Mailings page.
- Go to the Recipient upload section.
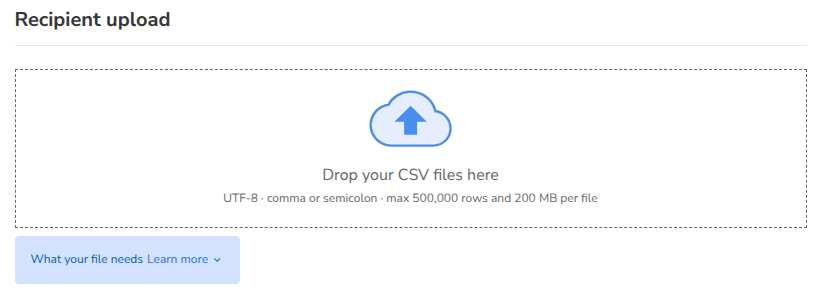
- Drag your CSV files onto Drop your CSV files here. You can also click the area and select the files.
You can add many files at the same time.
Step 2: Match each file to a variation
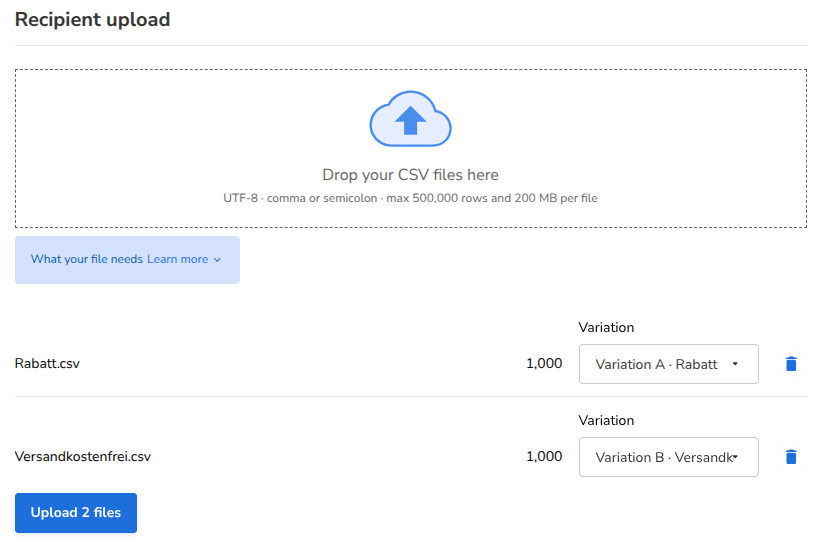
The dashboard checks each file before it sends anything. The row shows Checking column names…. Then the row shows the file name and the number of rows.
If your One-Shot has more than one variation, each file needs a variation:
- Name the file after the variation. The dashboard then selects the variation for you. Use the name that you gave the variation, for example
Rabatt.csvfor Variation A · Rabatt. The letter name also works, for exampleVariation A.csv. Upper and lower case and spaces do not matter. - For all other files, select the variation in Variation. The list shows Variation A, Variation B and so on, and the name of the variation if you gave it one.
- A file that passes the column check but has no variation shows Choose a variation for this file.
If your One-Shot has only one variation, there is no Variation field. All files go to that variation.
To remove a file from the list, click the bin icon in its row.
Step 3: Fix problems
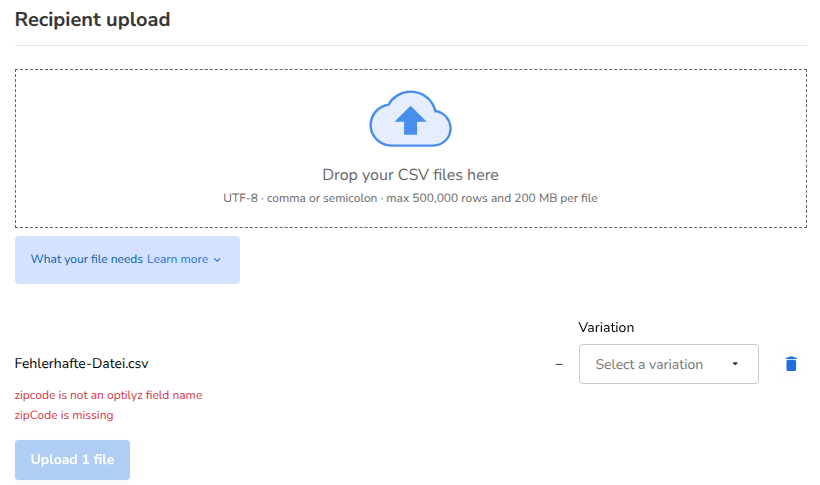
If a file has a problem, the row shows a red message under the file name. The upload button stays disabled. Its tooltip says Fix or remove problematic files to upload.
To fix a file:
- Remove the file from the list with the bin icon.
- Correct the file on your computer. See Problems and how to fix them.
- Add the corrected file again.
In the example, the file uses the column name zipcode. The row shows zipcode is not an optilyz field name and zipCode is missing.
Step 4: Start the upload
Click the upload button. It shows the number of files, for example Upload 2 files.
If a validation is in progress, you cannot start the upload. The section shows A validation is running. Upload your files when the validation is complete. You can add and check your files in the meantime.
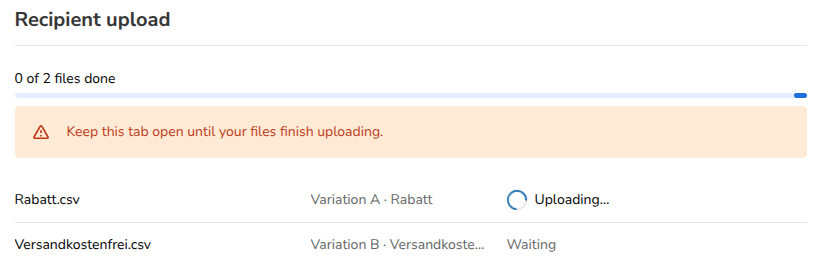
The files go up one after the other. A progress bar shows how many files are done, for example 0 of 2 files done.
Keep this tab open until your files finish uploading. If you close the tab, the files that are not sent yet stop.
Each file shows a status:
| Status | What it means |
|---|---|
| Waiting | The file waits for its turn. |
| Uploading… | Your browser sends the file. |
| Adding recipients… | optilyz received the file and adds the rows. |
| 1,000 rows added (example) | The file is done. The number shows the rows that optilyz added. |
| Status unknown | The dashboard lost track of the file. The file possibly arrived. See Problems and how to fix them. |
| A red message | The file was not added. See Problems and how to fix them. |
Step 5: Check the result
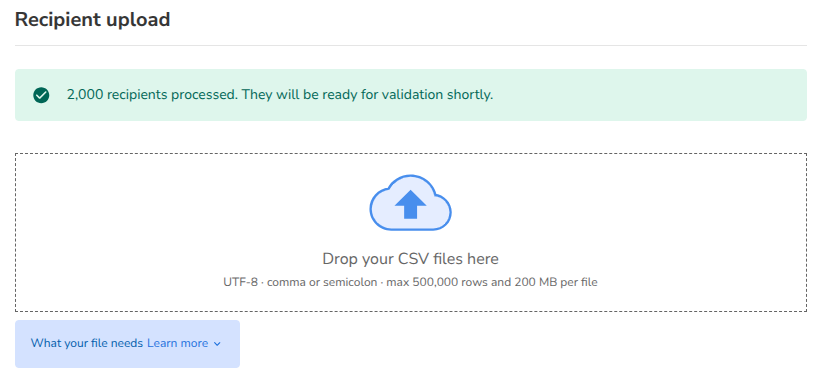
When all files are done, the list clears. A message shows the result:
- Green, for example: 2,000 recipients processed. They will be ready for validation shortly.
- Red: 1 file was not added, or the number of files. Each line shows the file name and the reason.
- Orange: We could not confirm 1 file, or the number of files, with Reload the page to see whether these files arrived.
What happens next
The uploaded recipients wait for recipient validation. In the Recipient validation section, they count as … awaiting validation.
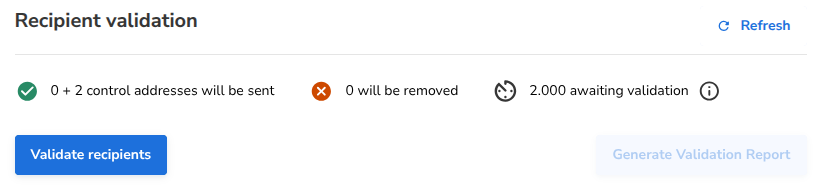
Click Validate recipients to check them. You can upload more files later and validate again. The step-by-step guide shows how validation, the postal handover date and booking work.
Problems and how to fix them
| Message | What to do |
|---|---|
| The file is too large. Maximum file size is 200.00 MB. | Split the file into smaller files. You can match two files to the same variation. |
| Unsupported file type. Allowed types: .csv, .csv. | Save the file as a CSV file. The file name must end in .csv. |
| Your file is not UTF-8. In Excel, use File > Save As > CSV UTF-8 (Comma delimited). | Save the file again with UTF-8 encoding, as the message says. |
| Your file must be comma or semicolon delimited. | Save the file again with a comma or a semicolon between the values. A tab does not work. |
| Your file has a header row but no recipient rows. | Add the recipients below the header row, or remove the file. |
| Your file has more than 500,000 rows. | Split the file into smaller files. You can match two files to the same variation. |
| Your file has a row that is too long. A row can hold about 100,000 characters. Rows are usually much shorter, so a quote in your file is probably not closed. | Find the quotation mark that is not closed, and close or delete it. |
| We could not read this file as a CSV file. | Open the file in your spreadsheet program. Save it again as a CSV UTF-8 file. |
| kundennr is not an optilyz field name (example) | Rename the column to a column name from the list above, or delete the column. Check the upper and lower case. If there is more than one such column, the message says … are not optilyz field names. |
| zipCode is missing (example) | Add the missing column. The message can also name a group, for example lastName or fullName is missing or street + houseNumber or address1 is missing. |
| Duplicate column: city (example) | Keep only one column with this name. |
| 1 column name(s) are blank (example) | Give each column a name, or delete the empty columns. |
| firstName + fullName cannot be in the same file (example) | Keep one of the two forms. Delete the other column. |
| Choose a variation for this file | Select a variation in Variation. |
| An unexpected error occurred | Remove the file and add it again. If the problem stays, contact Customer Success. |
| Your file is missing a required column. | Check the required columns above. Correct the file and upload it again. |
| A validation was in progress when your file arrived. Upload it again once the validation has finished. | Wait until the validation is complete. Then upload the file again. |
| Validation running | A validation started while the file waited. Upload the file again when the validation is complete. |
| Upload failed, please try again or contact our support. | Upload the file again. If the problem stays, contact Customer Success. |
| Something went wrong | Upload the file again. If the problem stays, contact Customer Success. |
| Status unknown or We could not confirm 1 file | Reload the page. Check the number … awaiting validation in the Recipient validation section. If you are not sure, contact Customer Success before you upload the file again. |
| a validation was running. Upload this file again when the validation is complete. | Wait until the validation is complete. Then upload the file again. |
| the upload did not finish | Upload the file again. |
| the import failed. Contact support. | Contact Customer Success. |
| A CSV upload is in progress. You can validate recipients again once it has finished. (in the Recipient validation section) | Wait until the upload is complete, also in other browser tabs. Then click Validate recipients again. |
Good to know
- An upload blocks other actions. While the upload is in progress, you cannot click Validate recipients or Edit. The Edit tooltip says You cannot edit your One-Shot while a CSV upload is in progress.
- A validation blocks the upload. While a validation is in progress, the upload button tooltip says You cannot upload while a validation is running.
- Each upload adds recipients. A new file does not replace an earlier upload. Two files for the same variation are allowed. The recipients add up.
- Edit deletes your uploaded recipients. Edit deletes all recipients of the One-Shot, also the recipients from CSV files. The dialog says All recipients you have pushed will be deleted. After the edit, click Start collecting recipients again, and upload your files again.
- CSV files need no data mapping. The column names tell optilyz which value goes where.
- Uploads fix the data mapping. This applies only if you also send recipients from Emarsys or Salesforce Marketing Cloud. When your One-Shot has a data mapping, the first recipients fix it. Recipients from CSV files count too. To change the data mapping after that, you must use Edit. So set up the data mapping before you upload.
- The counts are totals. The Recipient validation section shows one number for all sources together. It does not show how many recipients came from CSV files. If recipients from CSV files could not be validated, the section lists CSV as a source.